After a major snowstorm, Midwest homes can take a beating in ways that aren’t always obvious. Snow piles on roofs, ice clogs gutters, and the deep freeze stresses out all sorts of systems.
If you check your property soon after the storm, you’ll catch small issues before they turn into wallet-draining repairs.
Heavy snow damage tends to sneak up over time. Ice dams can trigger leaks inside. Tree branches weighed down by snow might snap and crash down, and melting snow can pool around your foundation, sometimes leading to cracks.
Acting fast protects both your house and the people inside. Just a quick walk around outside and a few checks indoors can reveal what needs fixing.
Honestly, most of these steps aren’t rocket science—any homeowner can handle the basics.
Key Takeaways
- Check your roof, gutters, and foundation for damage or blockages within a day or two after the storm
- Watch for ice dams, sagging rooflines, and water stains inside that might mean leaks
- Clear snow from the foundation and remove broken branches to head off more trouble
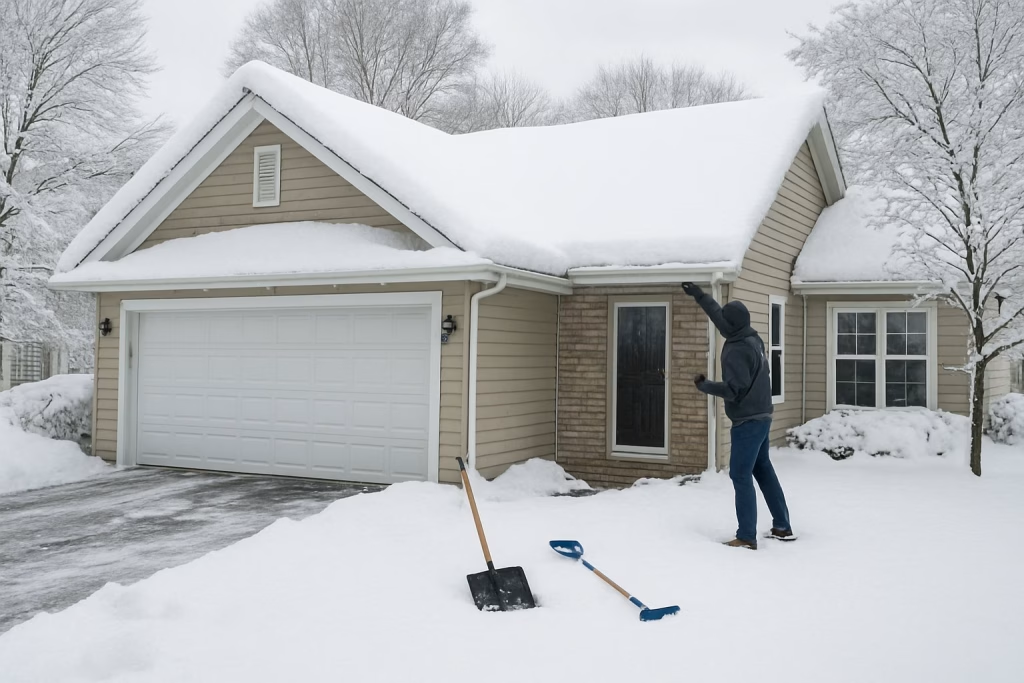
Immediate Exterior Checks for Snowstorm Damage

Heavy snow puts real stress on your home’s exterior, and it’s best to check things out right after the storm. Start with the roof, ice buildup, drainage, and trees or power lines that could cause problems.
Assess Roof Snow Load and Visible Damage
Snow weight can push a roof to its limits, especially after a storm drops 15 to 20 inches or more. A cubic foot of fresh snow weighs about 7 pounds, but if it’s wet, it can get three times heavier.
Grab some binoculars and eyeball the roof from the ground. If you spot sagging, ceiling cracks, or doors that suddenly stick, those are red flags. In that case, get the snow off right away.
Look for missing or cracked shingles. Ice and snow can lift them as temps swing up and down. Pay extra attention near chimneys, vents, and skylights—those spots usually show damage first.
If you see a foot or more of snow up there or any of those warning signs, it’s time to call in pros for removal. A roof rake works for clearing edges if you stay on the ground.
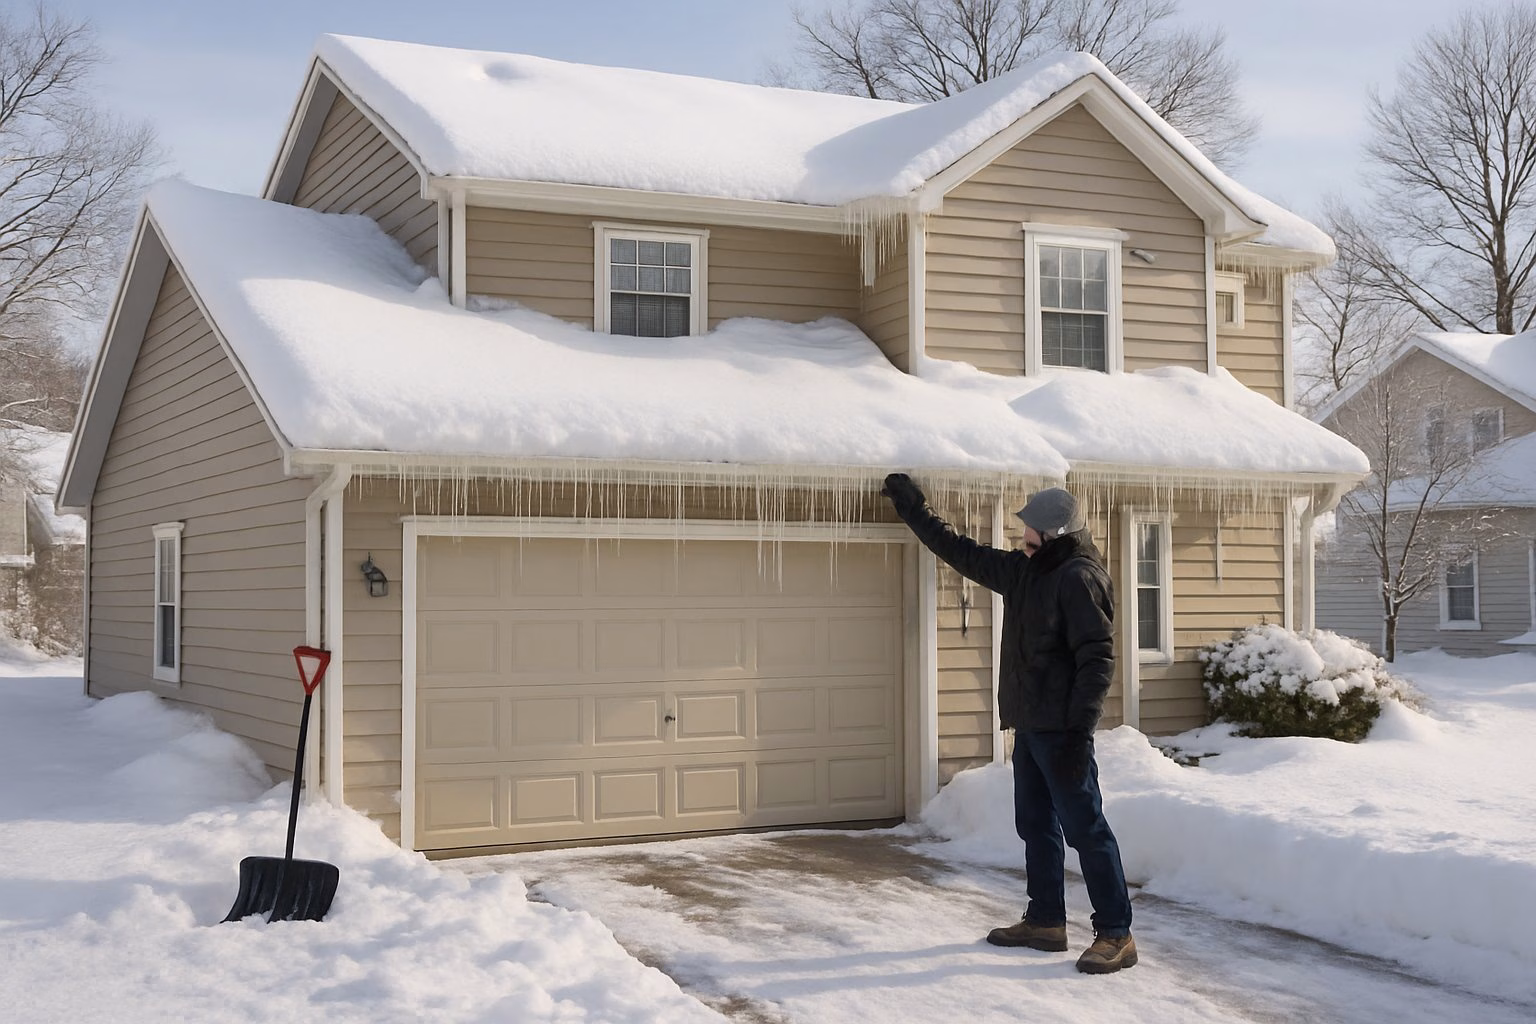
Inspect for Ice Dams and Ice Buildup
Ice dams crop up when heat sneaks through the roof, melts snow, and that water refreezes at the edge. This dam traps water, which can sneak under shingles and into your house.
In places like Wisconsin, ice dams are almost a winter tradition thanks to all the freeze-thaw cycles. Watch for icicles along the roof, ice in the gutters, and water stains on walls inside or out.
If you spot thick ice ridges at the roof’s bottom edge, that’s a sign. Ice dams love north-facing roofs that don’t get much sun. Water from dams can rot wood, trash insulation, and get mold going.
Don’t just hack away at the ice—it’ll wreck your shingles and gutters. Try laying a fabric tube filled with calcium chloride across the dam to melt a path. For the long haul, beef up attic insulation and ventilation to keep the roof cold.
Check Gutters and Downspouts for Blockages
Gutters and downspouts need to move meltwater away from your foundation. If they’re blocked with ice or debris, water can overflow and collect where you don’t want it.
Ice-filled gutters get heavy and can pull away from the house. Check for loose or sagging sections and repair any damage before the next snow hits.
Downspouts should send water at least 5 feet from your home. Snow piles often block the ends, so clear them out to keep water from flooding your basement.
Once it’s above freezing, pour some water into the gutters. If it drains right through, you’re good. If not, you’ve got a blockage to clear.
Look for Damage to Trees and Power Lines
Snow and ice can snap tree branches, which sometimes end up on homes, cars, or—worst case—people. Walk your property and check every tree near your house.
Keep an eye out for:
- Hanging or cracked branches that could fall anytime
- Split trunks showing stress
- Branches touching power lines—that’s a shock risk
- Leaning trees that might have root issues
Branches within 10 feet of your house are the biggest worry. Mark dead or damaged limbs for removal, but don’t mess with any near power lines yourself.
If you see power lines sagging, sparking, or touching trees, call the utility company right away. Stay at least 35 feet back from downed lines. Ice can snap lines and leave dangerous situations that stick around for days.
Critical Roof and Attic Inspections
After a big snowstorm, you really need to check both the roof and attic. Heavy snow piles up, and that’s when ice dams and leaks start causing trouble.
Perform a Visual Roof Inspection
Start by checking the roof from the ground with binoculars. If you see sagging, that’s too much snow weight. Icicles along the edge often mean ice dams are forming.
Check out the shingles and flashing around chimneys and vents. Heavy snow and ice can loosen or damage them. If you see missing or lifted shingles, fix them ASAP to keep water out.
Look at the gutters and downspouts for ice. If they’re clogged, water will go under the shingles and rot the roof deck.
Don’t risk your safety. Never climb a snowy or icy roof. If things look bad or unsafe, bring in a pro right away.
Inspect Attic for Leaks and Moisture
The attic shows problems you can’t see from outside. Grab a flashlight and check rafters and the underside of the roof for dark stains or wet spots—that’s where water got in.
Look for frost on the underside of the roof sheathing. When warm, damp air from inside meets cold roof surfaces, frost forms. If you ignore it, you might get mold or wood rot.
Check if the insulation is wet or squished down. Wet insulation doesn’t work well and takes forever to dry. If it’s compressed from water, replace it to keep your home efficient.
Take a close look around roof penetrations like chimneys, vents, and pipes. Water loves to sneak in there during heavy melts. If you find fresh water marks or drips, fix them right away before they get worse.
Identify Ice Dam Warning Signs
Ice dams form when heat leaks through the roof, melts snow, and it refreezes at the edge. That dam traps water behind it. In Wisconsin, this is just part of winter.
Usually, the first thing you’ll notice is big icicles hanging from the gutters or roof edge. Thick ones mean water is stuck. Water stains on outside walls or soffits also point to ice dam trouble.
Inside, check upper-floor ceilings near exterior walls for water stains or damp spots. Peeling paint or wallpaper in those rooms means water is getting in. If you spot these, act fast—water finds its way in quickly.
Prevention is just as important as finding the problem. Good attic ventilation and insulation stop heat loss and keep ice dams at bay. If you see warning signs, clear the roof edge and start planning a better long-term fix.
Gutter and Downspout Maintenance After Snowstorms
Heavy snow can really mess with gutters and downspouts. Ice blocks water flow and damage can spread to the roof or even inside if you don’t deal with it.
Remove Ice and Debris from Gutters
Ice in the gutters creates headaches. When snow melts and then refreezes, it builds thick layers of ice that block drainage. Trapped water backs up under shingles or spills down the home’s side.
If you see big icicles hanging from the gutters, water isn’t draining. Ice dams get worse if the cycle keeps going, forcing water backward under the roof.
Be careful with removal. Use a roof rake with a long handle to clear snow near gutters from the ground. Never get on a ladder when there’s ice. For serious ice, call in the pros.
Once you’ve cleared snow, check for debris that might have washed into the gutters before things froze. Even a little blockage can cause big problems when it thaws.
Ensure Downspouts Are Draining Properly
If downspouts freeze, water can’t leave the gutter system. This causes backups, which can lead to ice dams and pull gutters away from the house.
Walk around and check every downspout. Look for ice plugs at the top or bottom. Make sure extensions point away from the foundation at least five feet.
Pour warm water down the downspout to see if it flows. If water pools at the top, there’s ice in the way. Clear snow from the base so drainage works once things thaw.
Don’t forget the splash blocks—make sure they aren’t buried in snow. Water needs a clear path away from your foundation to prevent basement flooding.
Interior Safety and Systems Checks
After a big snowstorm, your home’s heating and safety systems get pushed to the limit. Carbon monoxide risks go up when furnaces run nonstop, and it’s harder to vent the house when you seal out the cold.
Test Carbon Monoxide and Smoke Detectors
Winter storms make your heating system work overtime, which means carbon monoxide can build up if there’s a problem. Carbon monoxide is invisible and odorless, but it’s deadly if you don’t catch it.
Press the test button on every carbon monoxide detector. The alarm should sound right away. If it doesn’t, swap the batteries and try again.
Check these spots:
- Hallways outside bedrooms
- Every floor, including the basement
- Near attached garages
- Close to fuel-burning appliances
If your carbon monoxide detector is more than seven years old, replace it. Old units can miss dangerous levels even with fresh batteries.
Test your smoke detectors the same way. Storms can knock out power or mess with wiring, so it’s worth double-checking.
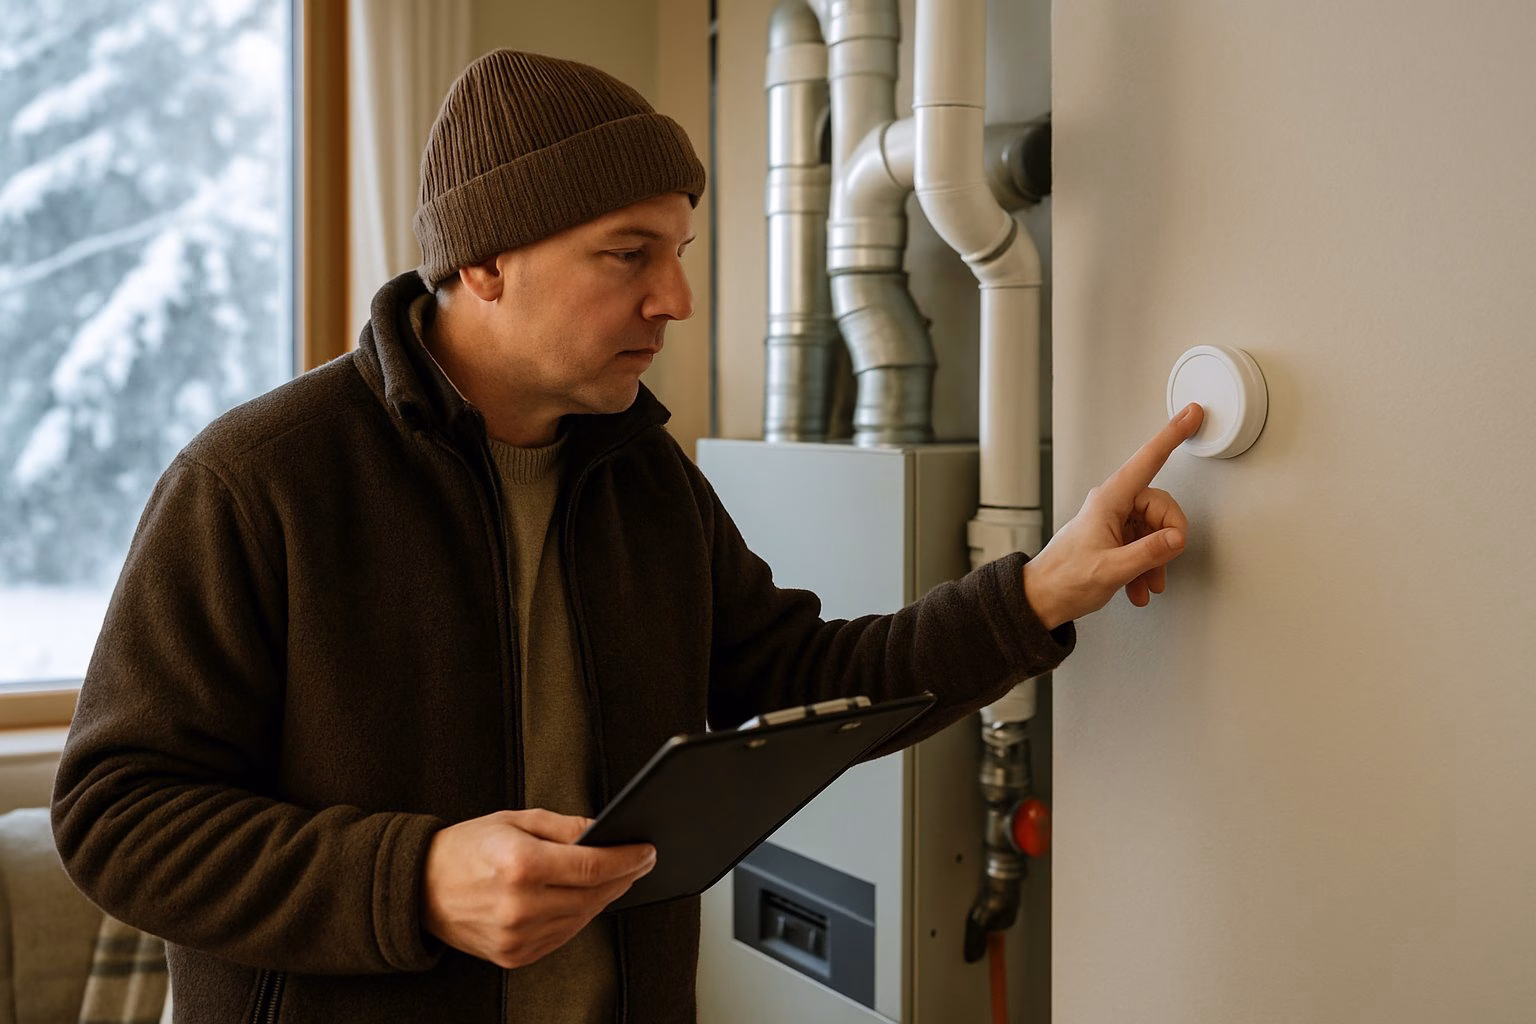
Check Heating Systems for Safe Operation
Heavy snow and bitter cold really put your furnace or boiler through its paces. Walk around your place and listen for any odd sounds coming from vents or the furnace itself.
If you hear rattling, banging, or whistling, that’s a red flag—something’s up and it needs fixing fast. Make sure vents and registers aren’t blocked by furniture, curtains, or any clutter that might’ve shifted during the storm.
Check your furnace filter. If it looks dirty or clogged, swap it out or clean it.
Blocked filters make your system work overtime and can even cause overheating or a shutdown. Take a peek at the furnace flame through the viewing window if you can do it safely.
The flame should burn steady and blue. If it’s yellow or flickering, that’s a sign of incomplete combustion—maybe even carbon monoxide risk.
Notice any rooms that feel much colder than the rest? Your system might be struggling, or maybe the ducts have issues.
If you smell gas or spot soot around vents, shut off the furnace and call a pro. Don’t mess around with that stuff.
Ensure Proper Ventilation
When you seal up the house tight against winter, indoor air quality tanks pretty quickly. All that moisture from cooking, showers, and just breathing gets trapped inside, leading to mold or condensation damage.
Run the bathroom fan during and after showers—give it at least 15 minutes. Use the kitchen vent when you’re cooking to get rid of extra humidity and any byproducts.
Signs of poor ventilation include:
- Condensation on windows
- Musty smells in closed-off rooms
- Moisture on walls or ceilings
- More allergy symptoms
Crack a window for a few minutes every day in different rooms, even if it’s cold. That quick air swap helps kick out stale air without losing much heat.
Check dryer vents outside—make sure snow and ice haven’t blocked them. You want moisture escaping, not hanging around inside.
Inspecting Windows, Doors, and Foundation
Heavy snow and ice can force moisture into weak spots around windows, doors, and the foundation. Check these areas as soon as you can after a storm to catch any problems early.
Identify Drafts and Weatherproofing Issues
Windows and doors really take a beating in big snowstorms. If cold air sneaks in, your weatherstripping is probably shot or the caulking has cracked.
Run your hand along window frames and door edges—feel any cold air? Try using a lit candle or incense stick; if the smoke moves, you’ve found a draft.
Look at the caulking around exterior window frames for cracks or spots where it’s pulling away from the siding. Door weatherstripping can compress or tear over time, too.
If a door rattles in its frame or you see light coming through the edges when it’s closed, it’s time for new weatherstripping. Honestly, it’s a cheap fix—usually under twenty bucks and about a half-hour of work.
Check for Water Infiltration
Snow piled up against windows and doors melts when it warms up, and that water can sneak in through tiny openings.
Look for water stains on walls near windows and around door frames. Check windowsills for standing water or discoloration.
Peel back carpet near exterior doors—does the floor underneath feel damp or look dark? That’s a problem. Ice dams on roofs can shove water sideways into walls near upstairs windows, too.
If you see water marks on ceilings near exterior walls, that’s a big warning sign. Moisture inside walls can cause mold in just a day or two.
Assess Foundation for Cracks or Leaks
When the soil freezes and expands, it puts pressure on foundation walls. That freeze-thaw cycle can create new cracks or make old ones worse.
Grab a flashlight and walk through your basement or crawl space. Look for fresh cracks in concrete walls or floors.
Hairline cracks under 1/4 inch wide are pretty common, but anything bigger needs a pro to check it out. Water stains or white mineral deposits on the walls show where moisture’s sneaking in.
Check basement windows for ice buildup in the window wells. Snow and ice that don’t drain can push water through window seals.
If you spot any damp areas on basement floors near outside walls, deal with it right away.
Outdoor Areas and Landscaping Concerns
Snow and ice can turn outdoor spaces into hazards, and heavy buildup stresses landscape features. Check your walkways, trees, and outdoor structures for damage before it gets worse—or someone gets hurt.
Evaluate Walkways and Driveways for Ice Hazards
Ice on walkways and driveways is no joke—it can send you or a guest flying. Keep an eye out for black ice, which is almost invisible but super slick.
Watch where snow has melted and then refrozen. Those spots usually turn into thick ice patches that a regular shovel can’t clear.
Shaded areas and spots near downspouts are especially likely to ice over.
Common problem areas include:
- Steps and stairs
- Transitions between surfaces
- Under roof overhangs
- Sloped driveway sections
Spread some ice melt or sand to get better traction. Rock salt works for most winter days, but if it’s really cold, calcium chloride is better. Just don’t overdo it near grass or plants—salt can wreck them by spring.
Assess Tree Limbs for Storm Damage
Snow and ice pile a lot of weight on tree branches. Wet snow is especially heavy—just a cubic foot can weigh up to 20 pounds. No wonder branches crack or snap off.
Look for partially broken limbs still hanging in trees. These so-called “widow makers” can drop without warning and cause serious damage or injury.
Focus on branches over walkways, driveways, cars, and power lines first.
Warning signs of damage include:
- Cracks in branches or trunk
- Odd-angled or leaning branches
- Stripped bark
- Fresh wood showing at break points
Cut small damaged branches with the right pruning tools. If big branches are near power lines or your house, call a pro. Around here, evergreens seem to get hit hardest since they hold more snow than bare trees.
Clear Snow from Decks and Patios
Snow piled up on decks and patios adds a lot of weight. Most decks are built for 40 to 60 pounds per square foot, but wet snow can go way over that.
Start shoveling once snow hits 6 inches or more. Use a plastic shovel to avoid gouging the boards, and don’t try to scrape down to bare wood—leave a thin layer to protect the finish.
Check railings and support posts for any signs of stress or shifting. Take a look underneath for sagging joists or footings that have moved.
If you notice water pooling on flat areas, that’s a drainage issue that needs sorting out before the next storm.
Brush snow off patio furniture and grills, too. Heavy snow can tear canvas covers, and metal frames might bend or rust if left wet for too long.
Next Steps: Prevention and When to Call a Professional
Fixing storm damage quickly is important, but honestly, preventing problems in the first place saves way more time and money. It’s smart to know when you need a pro and what you can handle yourself.
Schedule a Professional Roof Inspection
Book a professional roof inspection within a few weeks after a big snowstorm. Snow and ice can mess up shingles, flashing, and underlayment in ways you won’t see from the ground.
Inspectors look for loose or missing shingles, damaged valleys, and weak spots around chimneys and vents. They’ll also check for signs of ice dam damage that might not show up until things thaw out.
Most folks around here should get their roofs checked twice a year. Spring inspections catch winter problems early, and fall checkups get you ready for the next round.
Inspections cost way less than emergency repairs. A good inspector will spot little issues before they become leaks or structural headaches.
Plan for Preventive Gutter Maintenance
Cleaning your gutters regularly keeps most ice dam and water problems at bay. Do it at least twice a year—once after the leaves fall and again in early spring.
If you deal with a lot of snow, think about adding gutter guards or heating cables. These help cut down on ice and keep water flowing away from your house.
Make sure downspouts send water at least six feet from the foundation. Extension pipes or splash blocks come in handy during heavy melts.
Get your gutters cleaned out before winter really hits. Clean gutters handle snowmelt better and lower your risk of ice dams along the roof edge.
Know When to Hire for Repairs
Some repairs really do need a pro right away. If you spot sagging rooflines, big ceiling stains, or obvious structural damage, grab your phone and call a contractor—don’t wait around.
Emergency situations include:
- Active leaks during snowmelt
- Damaged or missing roof sections
- Cracked foundation walls
- Broken or detached gutters
Even minor stuff, like a small leak or a few loose shingles, shouldn’t sit for more than a few days. If you wait, that quick fix could turn into a nightmare.
Licensed contractors have insurance and warranties, so you’re not left hanging if something goes wrong. Plus, they actually know the local codes and what stands up to Midwest weather—something most of us don’t want to guess at.
Author: Danny Anderson
Danny Anderson is a seasoned home services professional with over 25 years of hands-on experience in residential construction, remodeling, and repair. After two decades in the field, Danny now shares his expertise through helpful guides, how-tos, and cost breakdowns aimed at making homeownership less stressful and more informed. His practical insights are trusted by homeowners nationwide.